Last summer I was quite bored, so I did the natural thing and made work for myself. I bought and rebuilt a go-kart. Here are some pictures with explanations of what exactly is going on below each one, roughly in the order that the rebuild was done in.
Unfortunately, I seem to have misplaced the photos from when I got the kart. Which is a real shame because it was quite a sight to see, it had an office chair as the seat, with the engine hanging about 4" out the back end of it, making turning under power impossible. Lots needed changing, as you'll see below.
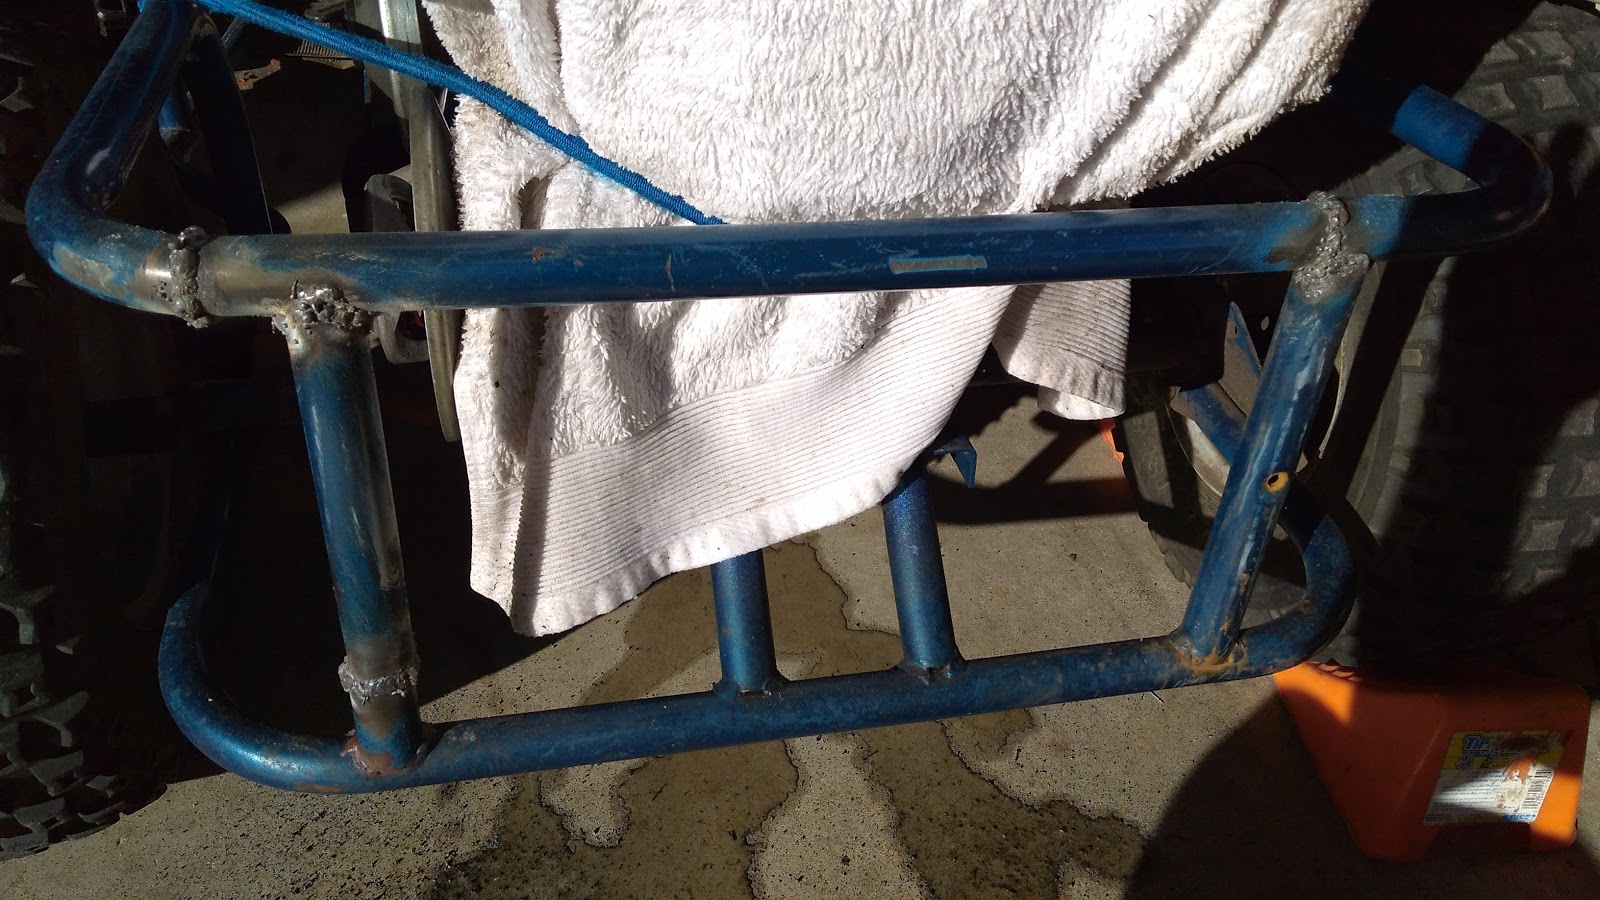
In this shot I have already created a new mounting plate for the engine to move it about 6" forward in the chassis. In addition, I took some tube steel and remade the rear frame of the kart. Moving the engine that far forward changed the ceter of gravity from ~3" behind the wheels to right about in the driver's seat.

Sorry for the fuzzy portrait shot, but this one shows how absolutely destroyed the driveshaft is. Some interesting backstory is required for this one: the man I'd bought it from had replaced the original 6 horsepower motor with this 13 horsepower one. The original setup had a 3/4" driveshaft and a matching torque converter input. When he changed the engine, the pressure washer the engine came out of used a 1" driveshaft, and he kept the same torque converter. 1" does not fit inside 3/4", no matter how hard one might try. So instead of getting the shaft machined to 3/4" or just buying a 3/4" shaft, the goon decided he was going to use an angle grinder and freehand it down to 3/4". It's somewhat difficult to tell in this particular photo, but there was quite an angle to this mangled driveshaft. This caused the kart to burn through belts like a suburban burns gas, so it had to get replaced. Hence why the engine is dismantled.

This photo shows the curvature of the driveshaft. They typically don't do that. The camshaft and balancing shaft have been removed in this image, and the pushrods for the valves are about to fall out.

The engine was clearly taken good care of, given the color of this oil that's never been changed. You can see the con-rod for the piston in the upper right corner of the cavity.

Here is the mint new driveshaft in, as well as the balancing shaft and the camshaft. The position of these gears is actually quite important, as it determines the timing of the engine. You can set the timing by looking at the teeth of each gear, there should be very small indentations that will line up if you've set it correctly. There are better pictures online detailing what I'm talking about.

Here the cover is reinstalled. I got a new gasket and used some gasket sealer to ensure a tight fit. I also put in some new motor oil, I believe I used 5W30 as that is what I had lying around the shop. It should be fine, as it's a single piston air-cooled engine, and if it's survived the abuse the previous owner put it through new oil can't hurt it. At some point I installed a new air filter, as the old one was packed with sand.

About halfway through I ran out of parts! This is a new torque converter, as the action on the other one was pretty mangled. I also got new chain, tie rods and tie rod ends, new spindles, and new front wheel bearings.

Here are the new spindles in. If you're lucky the spindles will just bolt right into the current brackets, If you're not (like I was) then you'll have to cut the old brackets off and weld the new ones that came with the spindles on in their place. I have cut most of the original brackets off but left just enough on the top that I don't have to do any measurements, I just lined them up and welded them on.

This is a decent shot of the new tie rods after they've been installed and somewhat aligned. Not a whole lot to it really, just take the old bits out and put the new ones in. These particular ones had regular threads on one end and reverse threads on the other, so all I had to do to adjust them was undo the nuts by the ends a little bit, then turn the tie rod to adjust both ends in or out at the same time. Pretty slick.

Here's the whole front end sorted.

These are the original seat rails. They weren't really holding anything on.

So I took them off.

And re-welded them on to fit the new seat I bought. Additionally, I welded some scrap steel to the 'rollcage' to help prevent it from folding in half. It all looks rather professional now.

When I had finally assembled it and went to start it, the engine would not fire. Eventually my old man came out and gave me some help, and we discovered that the valves had fallen off of the pushrods due to tearing the camshaft out and relieving the tension on them.


It's really frighteningly fast with the 13 horsepower Honda, and unfortunately it has the turning radius of a bus still. Eventually college rolled around and I moved, so I didn't get to use it except around Christmas time when I got it all painted and sold it. If I were to do this project again I'd just start from scratch, because working around some previous goon's hack job is an absolute nightmare.